How to Install Node.js for Playwright Automation (Beginner’s Guide)
Node.js is a powerful JavaScript runtime built on Chrome’s V8 engine, widely used for developing scalable applications, back-end services, and test automation frameworks like Playwright. In this step-by-step guide, you’ll learn how to install Node.js on Windows, macOS, and Linux, specifically for setting up Playwright test automation.
Why Install Node.js for Playwright?
Node.js is essential for running Playwright, a powerful end-to-end testing framework that automates web applications across different browsers. Playwright requires Node.js to execute scripts, manage dependencies, and integrate with CI/CD pipelines.
Step 1: Download Node.js
To install Node.js, follow these steps:
- Visit the official Node.js website: https://nodejs.org
- Choose between LTS (Long-Term Support) for stability or Current for the latest features.
- Download the appropriate installer for your OS (Windows, macOS, or Linux).
Step 2: Install Node.js
Windows Installation
- Run the downloaded
.msiinstaller. - Follow the installation wizard and accept the license agreement.
- Choose the installation path (default is recommended).
- Ensure that the Node.js runtime, npm package manager, and Add to PATH options are selected.
- Complete the installation and restart your computer if required.
macOS Installation
- Open the downloaded
.pkgfile. - Follow the installation prompts and provide your administrator password if required.
- Node.js and npm will be installed system-wide.
Alternatively, install via Homebrew:
brew install node
Linux Installation
For most Linux distributions, use a package manager to install Node.js.
Debian/Ubuntu
sudo apt update && sudo apt install nodejs npm -y
Fedora
sudo dnf install nodejs -y
Arch Linux
sudo pacman -S nodejs npm
Step 3: Verify Installation
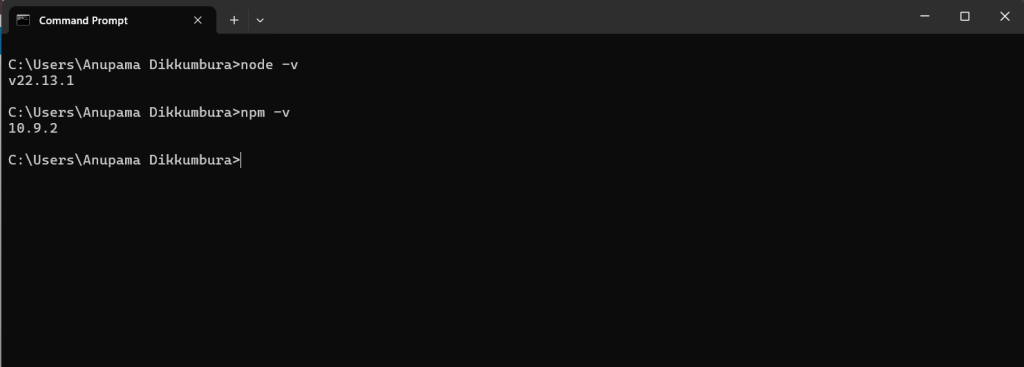
To check if Node.js and npm were installed successfully, run:
node -v  # Displays Node.js version
npm -v   # Displays npm version